
合 RHEL6 64位系统安装ORACLE 10g 64bit 数据库
Tags: Oracle
记得去年4月份的时候,为公司部署测试环境和UAT环境时,在红帽RHEL6 64位系统安装ORACLE 10g 64位数据库时遇到了许多小问题,当时匆匆忙忙也没记录一下这些问题,前几天在虚拟机安装ORACLE 64位 10g时,又有一些常见问题又遇到了,顺便整理一下这篇文章。也许在RHEL6 64版本上安装64位Oracle 10g 的问题是最多的,估计很多人都被这个虐过无数次(很多人都是Oracle虐我无数遍,我待Oracle如初恋)。从网上搜索关于这方面的内容就可见一斑。好,废话少说,正式进入正题。
步骤1:准备系统以及在虚拟机上设置共享目录DataBase,准备数据库安装介质。有些细节东西我可能会一笔带过,不清楚的可以看看我这篇文章Rhel-Server 5.5 安装ORACLE10
安装介质文件10201_database_linux_x86_64.cpio.gz,必须先用gunzip解压,然后用cpio解压cpio格式的文件。
解压安装文件
- [root@bogon DataBase]# cd /mnt/hgfs/DataBase/
- [root@bogon DataBase]# ls
- 10201_database_linux_x86_64.cpio.gz
- [root@bogon DataBase]# gunzip 10201_database_linux_x86_64.cpio.gz
- [root@bogon DataBase]# ls
- 10201_database_linux_x86_64.cpio
- [root@bogon DataBase]# cpio -idmv < 10201_database_linux_x86_64.cpio
- [root@bogon DataBase]# cd database/
- [root@bogon database]# ls
- doc install response runInstaller stagewelcome.html
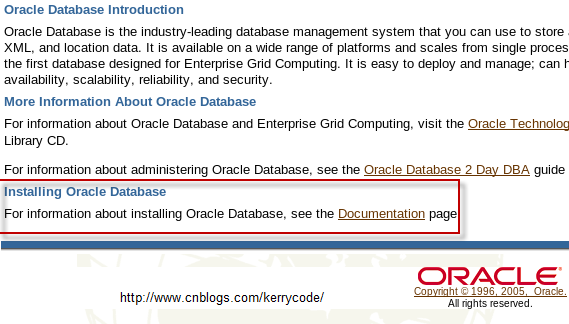
步骤2:查看安装文档,在解压目录下打开welcome.html文件,点击“Installing Oracle Database”下的“Documentation”链接即可进入。安装前最好将安装文档初略看一遍,当然你也可以在安装过程中参考。
[root@bogon database]# firefox welcome.html

步骤3:检查硬件要求(Checking the Hardware Requirements)
官方文档对系统硬件的要求
#At least 512 MB of physical RAM
#The following table describes the relationship between installed RAM and the configured swap space requirement.
RAM Swap Space
Up to 512 MB 2 times the size of RAM
Between 1024 MB and 2048 MB 1.5 times the size of RAM
Between 2049 MB and 8192 MB Equal to the size of RAM
More than 8192 MB 0.75 times the size of RAM
#400 MB of disk space in the /tmp directory
#Between 1.5 GB and 3.5 GB of disk space for the Oracle software, depending on the installation type
#1.2 GB of disk space for a preconfigured database that uses file system storage (optional
内存检测:内存最低要求512M,如今不能满足这个条件的计算机的都是老古董了,虚拟机我分配的是2G内存,如下所示
Code Snippet
- [root@bogon Desktop]# grep MemTotal /proc/meminfo
- MemTotal:2051700 kB
- [root@bogon Desktop]# free -g
- total used free shared buffers cached
- Mem:1 0 1 0 0 0
- -/+ buffers/cache:0 1
- Swap:3 0 3
交换空间(Swap Space)检测:
Code Snippet
- [root@bogon Desktop]# grepSwapTotal /proc/meminfo
- SwapTotal:4128760 kB
磁盘空间检测/tmp目录检测:
Code Snippet
- [root@bogon Desktop]# df -m /tmp
- Filesystem 1M-blocksUsed Available Use% Mounted on
- /dev/sda213878 2186 10987 17% /
- [root@bogon Desktop]# df -h
- Filesystem Size Used Avail Use% Mounted on
- /dev/sda2 14G 2.2G 11G 17% /
- tmpfs 1002M 100K 1002M 1% /dev/shm
- /dev/sda1 291M 30M 246M 11% /boot
- .host:/ 30G 16G 15G 52% /mnt/hgfs
- [root@bogon Desktop]#
CPU检测:
[root@bogon Desktop]# grep "model name" /proc/cpuinfo
model name : Intel(R) Core(TM)2 Duo CPU T6670 @ 2.20GHz
[root@bogon Desktop]#
步骤4:检查软件要求(Checking the Software Requirements)
下面是官方文档的系统要求


1 2 3 4 5 6 7 8 9 10 11 12 13 14 15 16 17 18 19 20 21 22 23 24 25 26 27 28 29 30 31 32 33 34 35 36 37 38 39 40 41 42 43 44 45 46 47 48 49 50 51 52 53 54 55 56 57 58 59 60 61 62 63 64 65 66 67 68 69 70 71 72 73 74 75 76 77 78 79 80 | The operating system must be one of the following: Red Hat Enterprise Linux 3.0 (Update 4 or later) Red Hat Enterprise Linux 4.0 (Update 1 or later) SUSE Linux Enterprise Server 9.0 The system must be running the following (or later) kernel version: Red Hat Enterprise Linux 3.0 2.4.21-27.EL Red Hat Enterprise Linux 4.0 2.6.9-11.EL SUSE Linux Enterprise Server 9.0 2.6.5-7.201 The following packages (or later versions) must be installed: Red Hat Enterprise Linux 3.0: make-3.79.1-17 compat-db 4.0.14-5.1 control-center-2.2.0.1-13 gcc-3.2.3-47 gcc-c++-3.2.3-47 gdb-6.1post-1.20040607.52 glibc-2.3.2-95.30 glibc-common-2.3.2-95.30 glibc-devel-2.3.2-95.30 glibc-devel-2.3.2-95.20 (32 bit) compat-db-4.0.14-5 compat-gcc-7.3-2.96.128 compat-gcc-c++-7.3-2.96.128 compat-libstdc++-7.3-2.96.128 compat-libstdc++-devel-7.3-2.96.128 gnome-libs-1.4.1.2.90-34.2 (32 bit) libstdc++-3.2.3-47 libstdc++-devel-3.2.3-47 openmotif-2.2.3-3.RHEL3 sysstat-5.0.5-5.rhel3 setarch-1.3-1 libaio-0.3.96-3 libaio-devel-0.3.96-3 Red Hat Enterprise Linux 4.0: binutils-2.15.92.0.2-10.EL4 compat-db-4.1.25-9 control-center-2.8.0-12 gcc-3.4.3-9.EL4 gcc-c++-3.4.3-9.EL4 glibc-2.3.4-2 glibc-common-2.3.4-2 gnome-libs-1.4.1.2.90-44.1 libstdc++-3.4.3-9.EL4 libstdc++-devel-3.4.3-9.EL4 make-3.80-5 pdksh-5.2.14-30 sysstat-5.0.5-1 xscreensaver-4.18-5.rhel4.2 SUSE Linux Enterprise Server 9 binutils-2.15.90.0.1.1-32.5 gcc-3.3.3-43.24 gcc-c++-3.3.3-43.24 glibc-2.3.3-98.28 gnome-libs-1.4.1.7-671.1 libstdc++-3.3.3-43.24 libstdc++-devel-3.3.3-43.24 make-3.80-184.1 pdksh-5.2.14-780.1 sysstat-5.0.1-35.1 xscreensaver-4.16-2.6 |
从文档中可以看出ORACLE 10g只支持到Red Hat Enterprise Linux 4.0,并没有明确表示支持Red Hat Enterprise Linux 6.0. 这是因为Oracle官方并没有在Rhel 4以后的版本测试过Oracle 10g,另外一方面应该是Oracle出于自己的商业利益战略考虑。安装过程中你必须修改配置文件 /etc/redhat-release 将“Red Hat Enterprise Linux Server release 6.0 (Santiago)” 改为“Red Hat Enterprise Linux Server release 4.0 (Santiago)”,否则安装过程会报错,无法继续。
查看内核版本,比文档要求的版本要高。
[root@bogon Desktop]# cat /proc/version
Linux version 2.6.32-71.el6.x86_64 (mockbuild@x86-007.build.bos.redhat.com) (gcc version 4.4.4 20100726 (Red Hat 4.4.4-13) (GCC) ) #1 SMP Wed Sep 1 01:33:01 EDT 2010
[root@bogon Desktop]# uname -r
2.6.32-71.el6.x86_64
检查必须安装以下软件包(或更高版本):注意千万不要用下面语句检查,否则全部都是没有,因为Red Hat Enterprise Linux 6.0下的包的版本可能比这个高,所以你最好忽略那些版本号,然后去检查。这部相当重要。安装过程很多报错信息就是因为这一步没有到位导致的。当然有些错误是因为缺少一些包,安装文档也没有提及(后面有讲解)
rpm -q binutils-2.15.92.0.2-10.EL4
rpm -q compat-db-4.1.25-9
rpm -q control-center-2.8.0-12
rpm -q gcc-3.4.3-9.EL4
rpm -q gcc-c++-3.4.3-9.EL4
rpm -q glibc-2.3.4-2
rpm -q glibc-common-2.3.4-2
rpm -q gnome-libs-1.4.1.2.90-44.1
rpm -q libstdc++-3.4.3-9.EL4
rpm -q libstdc++-devel-3.4.3-9.EL4
rpm -q make-3.80-5
rpm -q pdksh-5.2.14-30
rpm -q sysstat-5.0.5-1
rpm -q xscreensaver-4.18-5.rhel4.2
[root@bogon Desktop]# rpm -q binutils
binutils-2.20.51.0.2-5.11.el6.x86_64
[root@bogon Desktop]# rpm -q compat-db
package compat-db is not installed
[root@bogon Desktop]# rpm -q control-center
control-center-2.28.1-25.el6.x86_64
[root@bogon Desktop]# rpm -q glibc-*
glibc-2.12-1.7.el6.x86_64
[root@bogon Desktop]# rpm -q gcc
gcc-4.4.4-13.el6.x86_64
[root@bogon Desktop]# rpm -q gcc-c++
package gcc-c++ is not installed
[root@bogon Desktop]# rpm -q glibc
glibc-2.12-1.7.el6.x86_64
[root@bogon Desktop]# rpm -q gnome-libs
package gnome-libs is not installed
[root@bogon Desktop]# rpm -q libstdc++-
libstdc++-4.4.4-13.el6.x86_64
[root@bogon Desktop]# rpm -q make
make-3.81-19.el6.x86_64
[root@bogon Desktop]# rpm -q sysstat
sysstat-9.0.4-11.el6.x86_64
[root@bogon Desktop]# rpm -q xscreensaver
package xscreensaver is not installed
安装缺少的包,首先配置yum,如果缺少文件 rhel-debuginfo.repo ,新建文件 rhel-debuginfo.repo,其中Relhat6目录是Red Hat Enterprise Linux 6.0的安装介质目录,下面红色部分是需要根据你系统具体配置的部分
[root@bogon yum.repos.d]# vi rhel-debuginfo.repo
[rhel-debuginfo]
name=Red Hat Enterprise Linux LOCAL SOURCE
baseurl=file:///mnt/hgfs/DataBase/Relhat6/Server
enabled=1
gpgcheck=1
gpgkey=file:///etc/pki/rpm-gpg/RPM-GPG-KEY-redhat-release
接下来就是安装缺少的一些包的过程,甚是枯燥和无聊。
 View Code
有三个包没有,也找不到对应的安装文件,如下所示:
[root@bogon yum.repos.d]# rpm -q xscreensaver
package xscreensaver is not installed
[root@bogon yum.repos.d]# yum list xscreensaver
Loaded plugins: refresh-packagekit, rhnplugin
This system is not registered with RHN.
RHN support will be disabled.
file:///mnt/hgfs/DataBase/Relhat6/repodata/repomd.xml: [Errno 14] Could not open/read file:///mnt/hgfs/DataBase/Relhat6/repodata/repomd.xml
Trying other mirror.
Error: No matching Packages to list
[oracle@bogon database]$ yum list gnome-libs
Loaded plugins: refresh-packagekit, rhnplugin
Note Red Hat Network repositories are not listed below. You must run this command as root to access RHN repositories.
file:///mnt/hgfs/DataBase/Relhat6/repodata/repomd.xml: [Errno 14] Could not open/read file:///mnt/hgfs/DataBase/Relhat6/repodata/repomd.xml
Trying other mirror.
Error: No matching Packages to list
[root@bogon Packages]# yum list gnome-libs
Loaded plugins: refresh-packagekit, rhnplugin
This system is not registered with RHN.
RHN support will be disabled.
file:///mnt/hgfs/DataBase/Relhat6/repodata/repomd.xml: [Errno 14] Could not open/read file:///mnt/hgfs/DataBase/Relhat6/repodata/repomd.xml
Trying other mirror.
Error: No matching Packages to list
[root@bogon Packages]# rpm -q gnome-libs-
package gnome-libs- is not installed
步骤5: 创建需要的系统用户和用户组(Creating Required Operating System Groups and User)
5.1 首先检查是否存在用户组dba、oinstall
[root@bogon ~]# grep dba /etc/group
[root@bogon ~]# grep dba /etc/oinstall
5.2 创建用户组dba、oinstall
[root@bogon ~]# /usr/sbin/groupadd oinstall
[root@bogon ~]# /usr/sbin/groupadd dba
5.3 检查是否存在oracle用户
[root@bogon ~]# id oracle
id: oracle: No such user
5.4 创建oracle用户
[root@bogon ~]# /usr/sbin/useradd -g oinstall -G dba oracle
[root@bogon ~]# id oracle
uid=502(oracle) gid=502(oinstall) groups=502(oinstall),503(dba)
5.5 设置oracle用户的密码
[root@bogon ~]# password oracle
bash: password: command not found
[root@bogon ~]# passwd oracle
Changing password for user oracle.
New password:
Retype new password:
passwd: all authentication tokens updated successfully.
[root@bogon ~]#
步骤6: 配置Linux系统内核参数 Configuring Kernel Parameters
在 /etc/sysctl.conf文件中添加内核参数信息
[root@bogon ~]# vi /etc/sysctl.conf
kernel.shmall = 2097152
kernel.shmmax = 2147483648
kernel.shmmni = 4096
kernel.sem = 250 32000 100 128
fs.file-max = 65536
net.ipv4.ip_local_port_range = 1024 65000
net.core.rmem_default = 262144
net.core.rmem_max = 262144
net.core.wmem_default = 262144
net.core.wmem_max = 262144
[root@bogon ~]# vi /etc/security/limits.conf
添加
oracle soft nproc 2047
oracle hard nproc 16384
oracle soft nofile 1024
oracle hard nofile 65536
[root@bogon ~]# vi /etc/pam.d/login
[root@bogon ~]#
if [ $USER = "oracle" ]; then
if [ $SHELL = "/bin/ksh" ]; then
ulimit -p 16384
ulimit -n 65536
else
ulimit -u 16384 -n 65536
fi
fi
步骤7:创建安装路径 Creating Required Directories
[root@bogon ~]# mkdir -p /u01/app/oracle
[root@bogon ~]# chown -R oracle:oinstall /u01/app/oracle
[root@bogon ~]# chmod -R 775 /u01/app/oracle
步骤8:配置oracle用户的环境变量 Configuring the oracle User's Environment
[oracle@bogon ~]$ vi .bash_profile
[oracle@bogon ~]$ tail -20 .bash_profile
# .bash_profile
# Get the aliases and functions
if [ -f ~/.bashrc ]; then
. ~/.bashrc
fi
# User specific environment and startup programs
PATH=$PATH:$HOME/bin
export PATH
export ORACLE_SID=gsp
export ORACLE_BASE=/u01/app/oracle
export ORACLE_HOME=$ORACLE_BASE/product/dbhome_1


